Free USA Shipping on Orders over $35!
Love at First Write
Shopping Cart Click to expand menu
x

How to Fill a Fountain Pen

When you get your first fountain pen, you usually need to fill it with ink before you start writing. In this guide, we’ll go over all the fountain pen filling systems, explain how they’re different, and show you how to use them.
What Fountain Pen Filling System Do I Have?

Click the image or bolded text to jump to that filling system’s how-to section.

This type of fountain pen fills with cartridges.

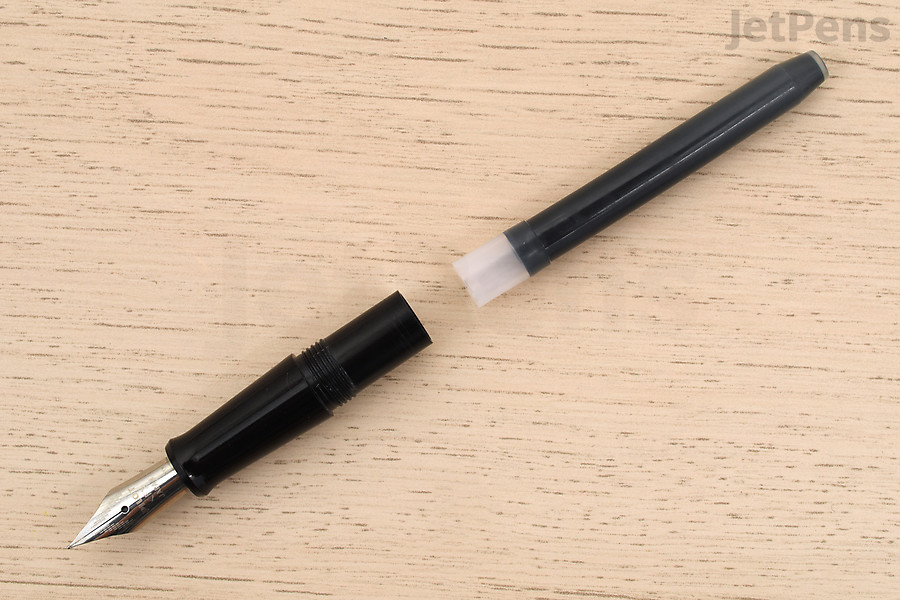
Cartridge
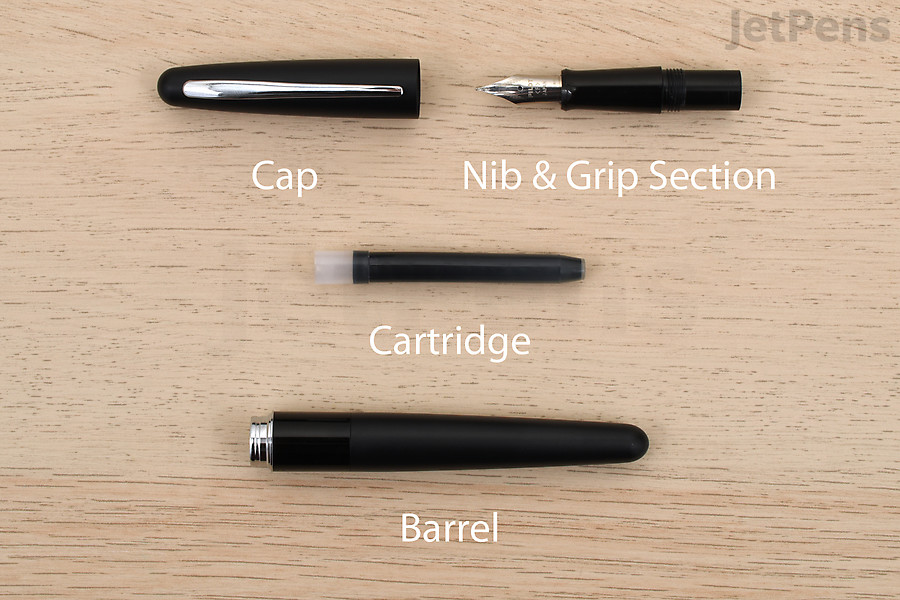
Almost all fountain pens are compatible with ink cartridges. A cartridge is an ink-filled tube that is installed in your fountain pen.

This type of fountain pen fills from an ink bottle with a converter.

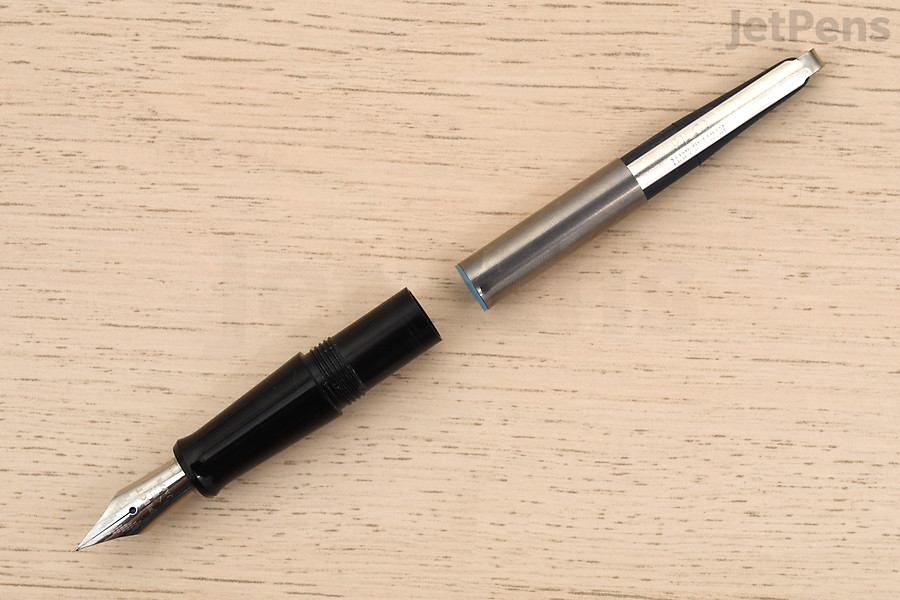
Converter
Many fountain pens that use cartridges can use converters. A converter is a separate part that is installed in your fountain pen.

This type of fountain pen fills from an ink bottle with a built-in piston mechanism.

Piston
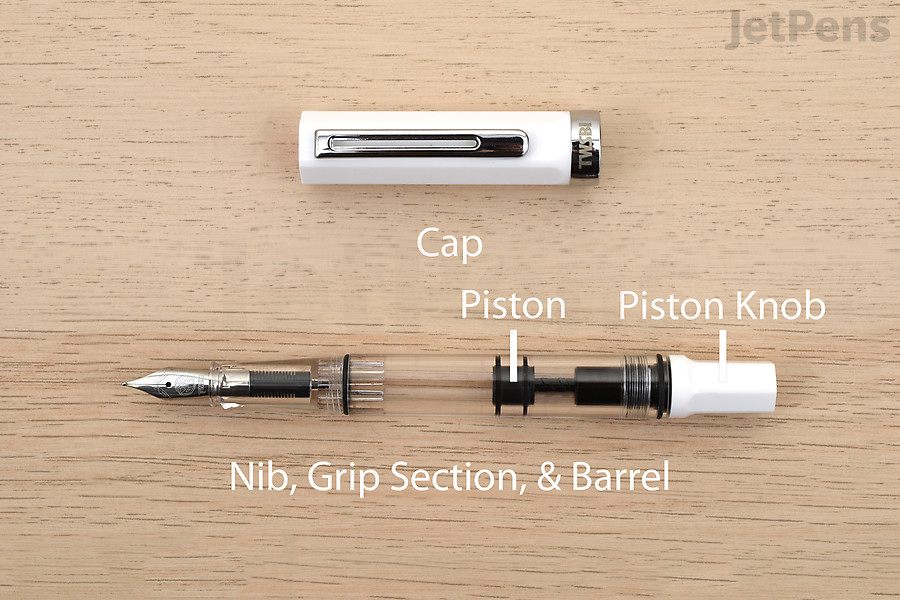
A piston is a built-in filling mechanism that allows you to fill your fountain pen from an ink bottle by turning a piston.

This type of fountain pen fills from an ink bottle with a built-in vacuum mechanism.

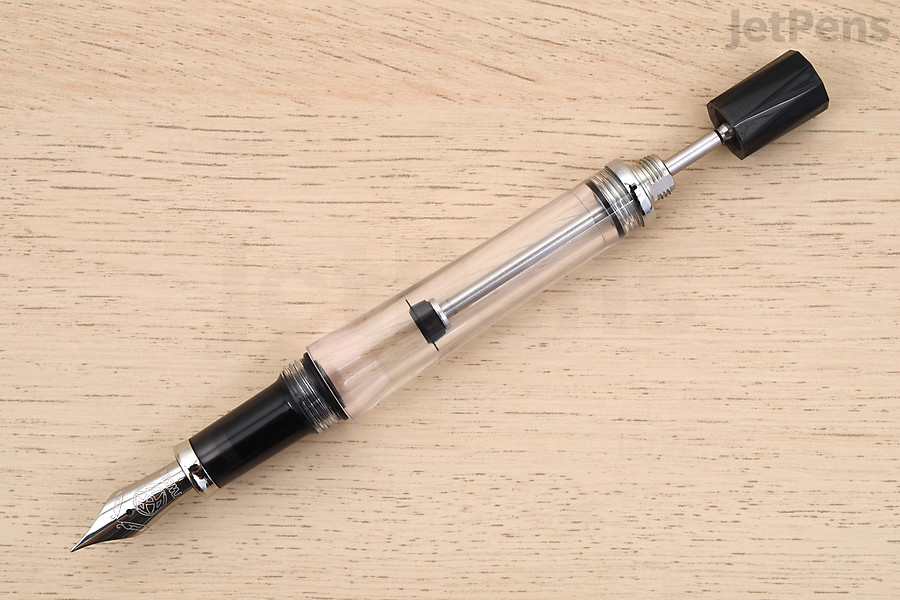
Vacuum
A vacuum is a built-in filling mechanism that allows you to fill your fountain pen from an ink bottle by pressing down on a plunger.

This type of fountain pen fills from an ink bottle with an eyedropper.

Eyedropper
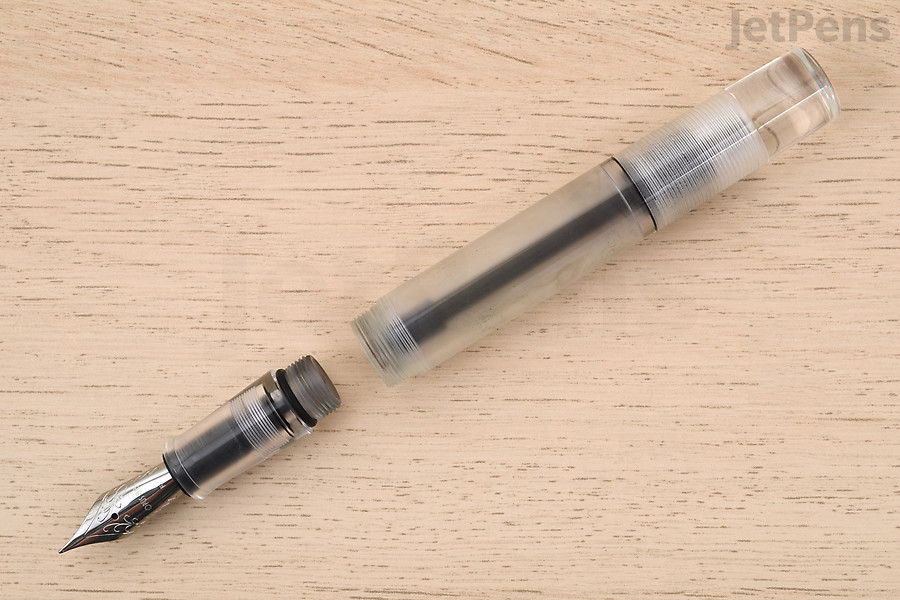
An eyedropper fountain pen uses its entire barrel as the ink reservoir. It’s filled using an eyedropper, syringe, or pipette.

Cartridge-Filled Fountain Pens
An ink cartridge is the most common type of filling system. A cartridge is a small tube filled with ink that has a stopper on one end. The stopper can be a plastic flap or a metal ball. By pushing the cartridge into the fountain pen’s grip section, the stopper is pierced or the ball is knocked out of position, allowing ink to flow into the feed.

Almost all fountain pens are compatible with cartridges, and many include cartridges to get you started. However, while some fountain pens use standard international cartridges, there are fountain pens that can only be used with proprietary cartridges. For example, Pilot Fountain Pens must be filled with Pilot Cartridges.

You can check to see what cartridges are compatible with your fountain pen by clicking the “Recommended Refills/Parts” button on the fountain pen’s product page. Alternatively, if you have a cartridge, you can click on the “Compatible Products” button on the cartridge’s product page to see what fountain pens can use it.

How to Fill a Fountain Pen with a Cartridge

We used a Pilot Metropolitan Fountain Pen and Pilot Namiki Black Ink Cartridge in this section.

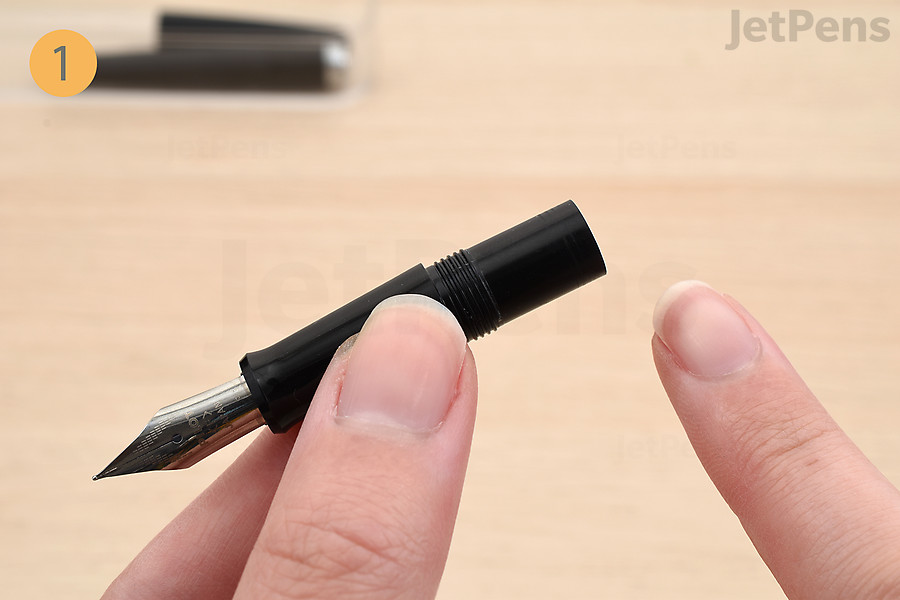
Uncap the pen and unscrew the grip section.
Step 1: Uncap the pen and unscrew the grip section. The cartridge should be installed in the feed side of the grip section, on the other side of the nib.
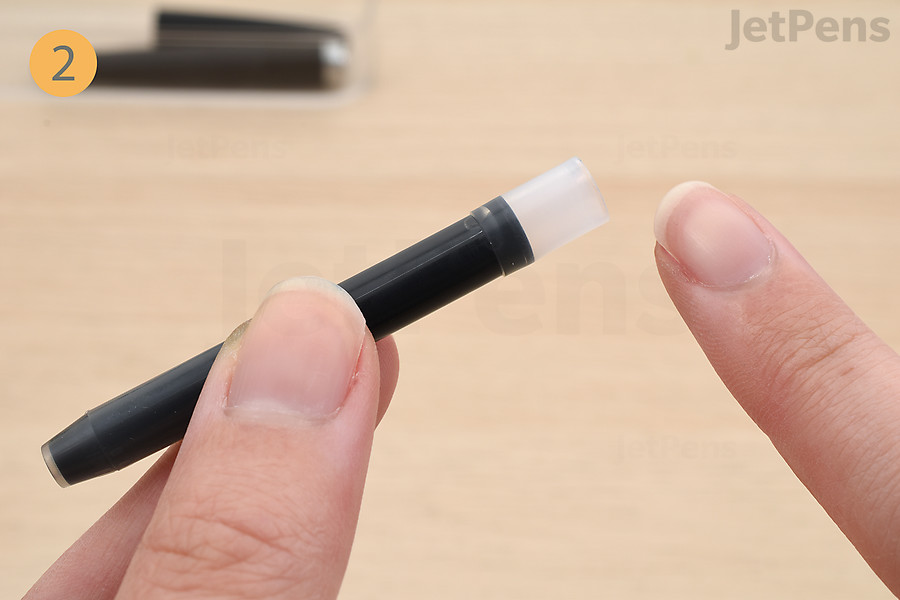
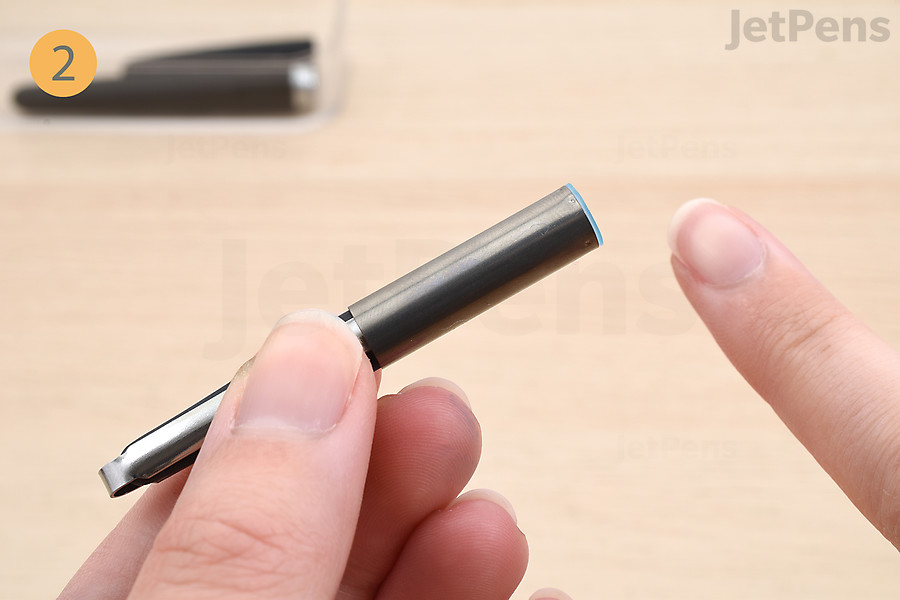
Locate the cartridge’s opening.
Step 2: Locate the cartridge’s opening.
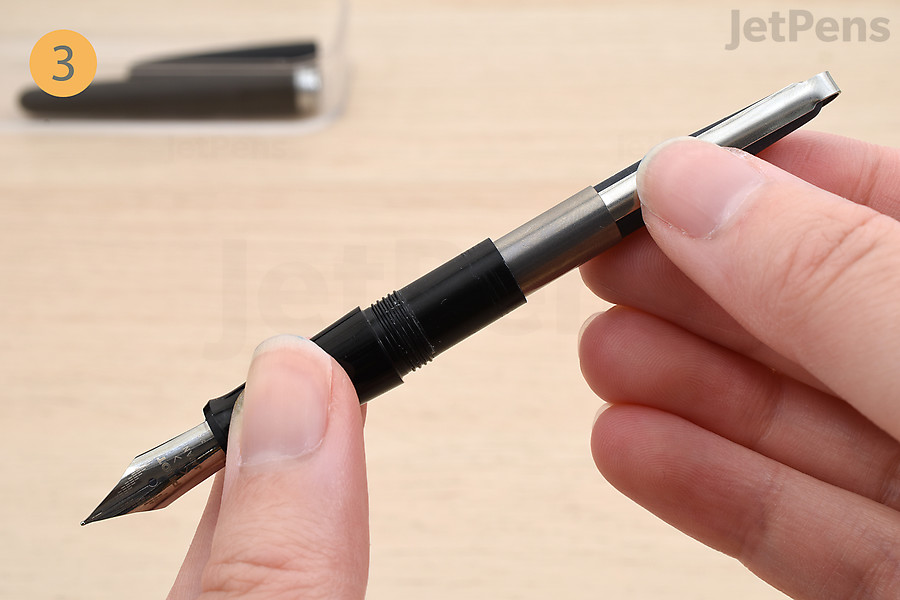
Firmly insert the cartridge into the fountain pen’s grip section.
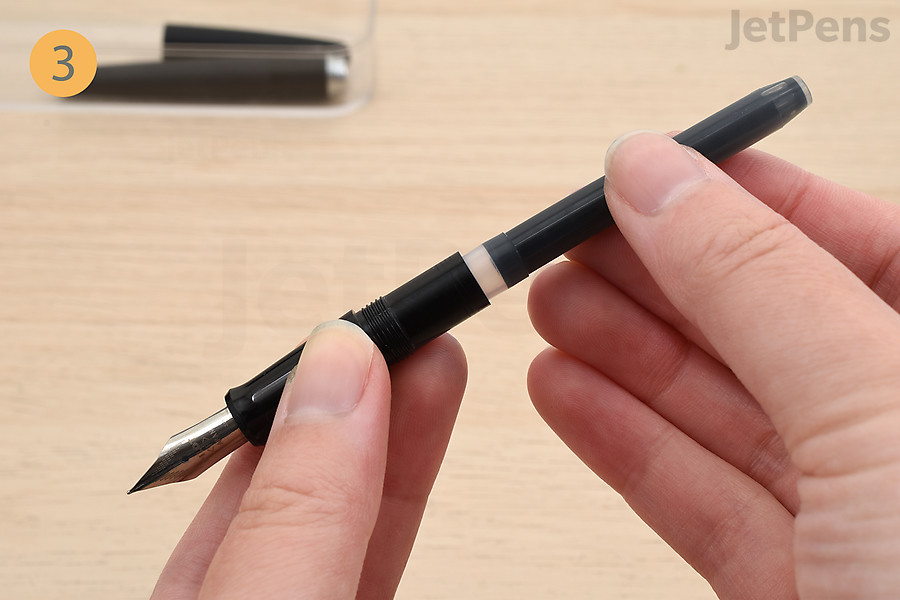
Step 3: Insert the cartridge into the fountain pen’s grip section. Press the cartridge down firmly until the stopper is punctured.
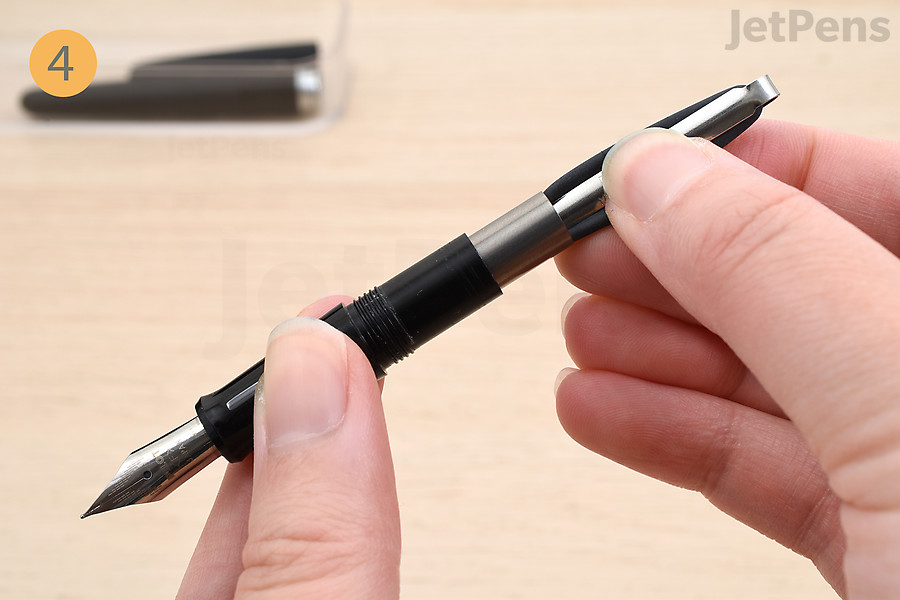
Reassemble the fountain pen and cap it.
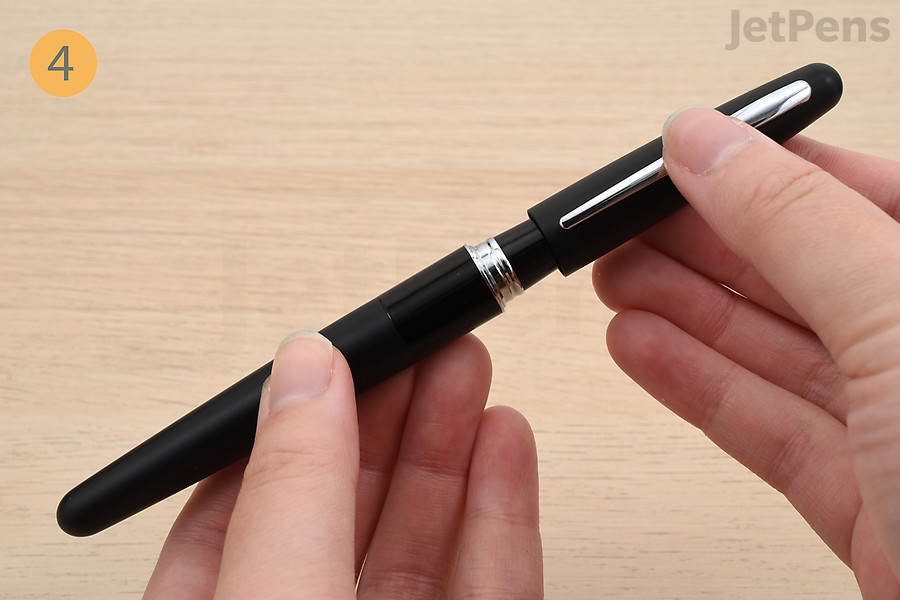
Step 4: Reassemble the fountain pen and cap it.
Let the pen sit for at least fifteen minutes.
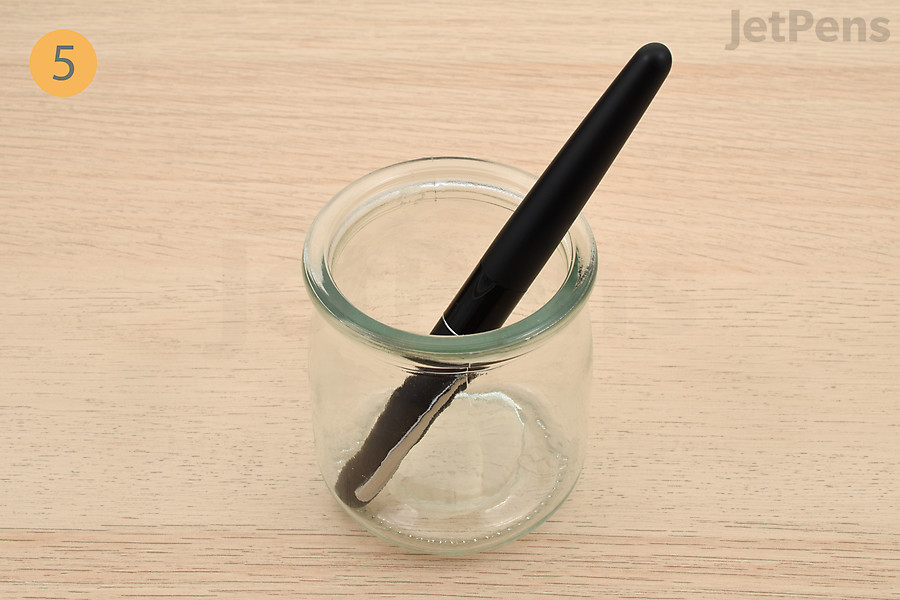
Step 5: Let the pen sit for at least fifteen minutes so the ink can flow into the feed. You can set it in a cup so the nib is facing down, or put it on its side in a tray.
Try a few test scribbles.
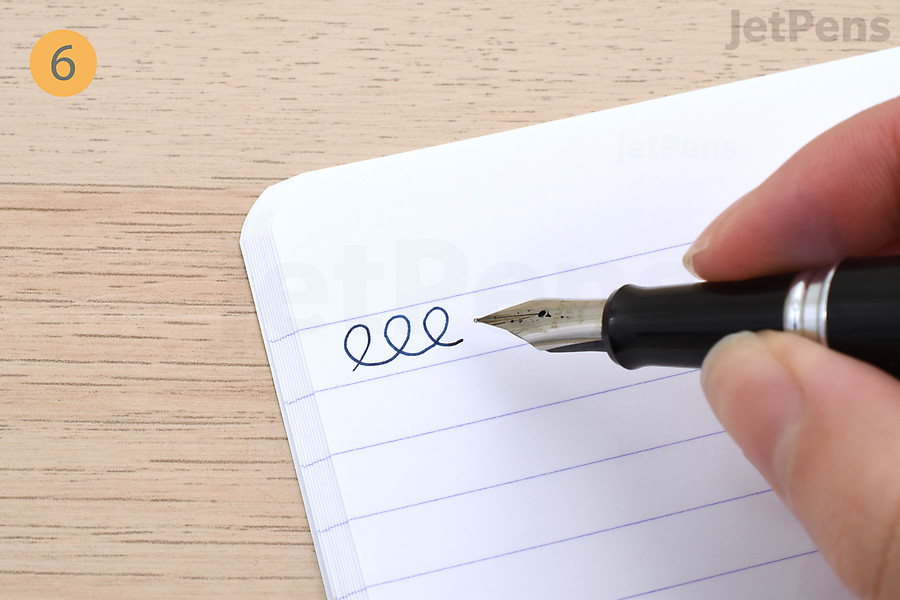
Step 6: Try a few test scribbles. If the pen isn’t writing yet, cap it and let it sit for a while again. It can take up to an hour for ink to reach the feed.
Advantages and Disadvantages of Cartridges
Advantages Disadvantages
  • Cartridges are easy to use.
  • Cartridges are lightweight and portable.
  • Individual cartridges are cheaper than bottled inks.
Converter-Filled Fountain Pens
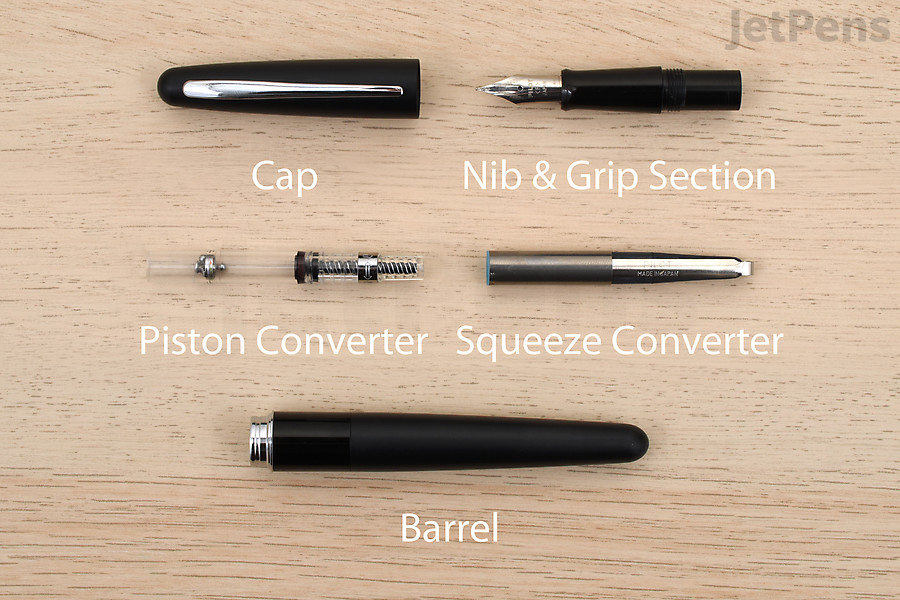
Converter-filled fountain pens can be filled with piston or squeeze converters.
A converter is another common type of filling mechanism. Many fountain pens that are compatible with cartridges can also be used with converters. This is useful for writers who like the convenience of cartridges but still want to use bottled inks. You can switch between a cartridge or converter whenever you want (though be sure to clean your pen first if you’re using a different color).

Converters are parts that are installed into a fountain pen. You can think of a converter as a drinking straw for your pen. When you use them, you create suction that “pulls” ink into the converter.

As with cartridges, some converters are only compatible with certain pens. For example, LAMY Fountain Pens can only use LAMY Converters. You can check to see what converters are compatible with your fountain pen by clicking the “Recommended Refills/Parts” button on the fountain pen’s product page. If you already have a converter, you can click on the “Compatible Products” button on the converter’s product page to see what fountain pens can use it.

There are two types of converters: piston converters and squeeze converters. Piston converters use twist mechanisms to draw in ink, while squeeze converters use press bars. We’ll demonstrate how to use them both below. You’ll need a paper towel or soft cloth to wipe the nib and grip section clean.

How to Fill a Fountain Pen with a Piston Converter

We used a Pilot Metropolitan Fountain Pen and Pilot CON-40 Converter for this section.

Uncap the pen and unscrew the grip section.
Step 1: Uncap the pen and unscrew the grip section. The converter should be installed in the feed side of the grip section, on the other side of the nib.
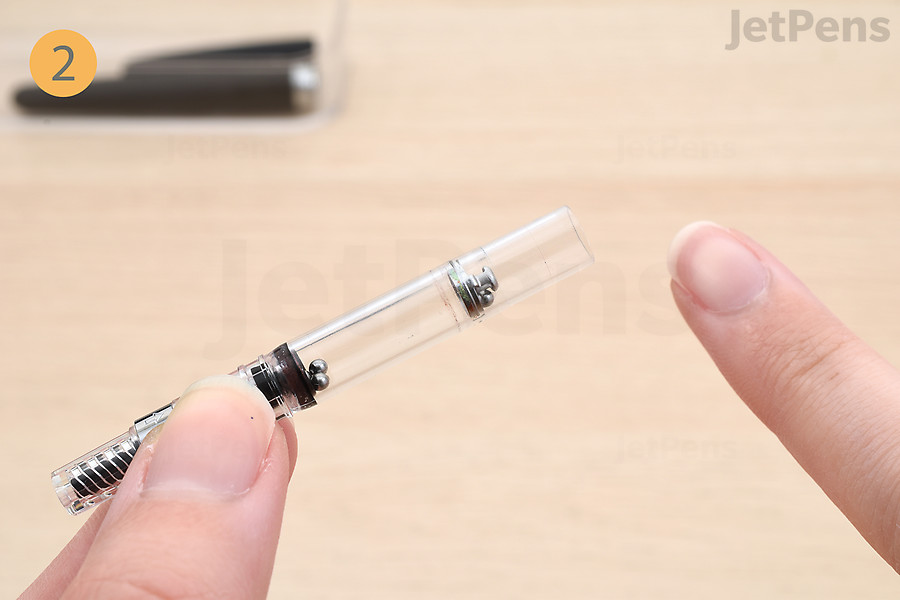
Locate the converter’s opening.
Step 2: Locate the converter’s opening. This is on the opposite side of the piston knob.
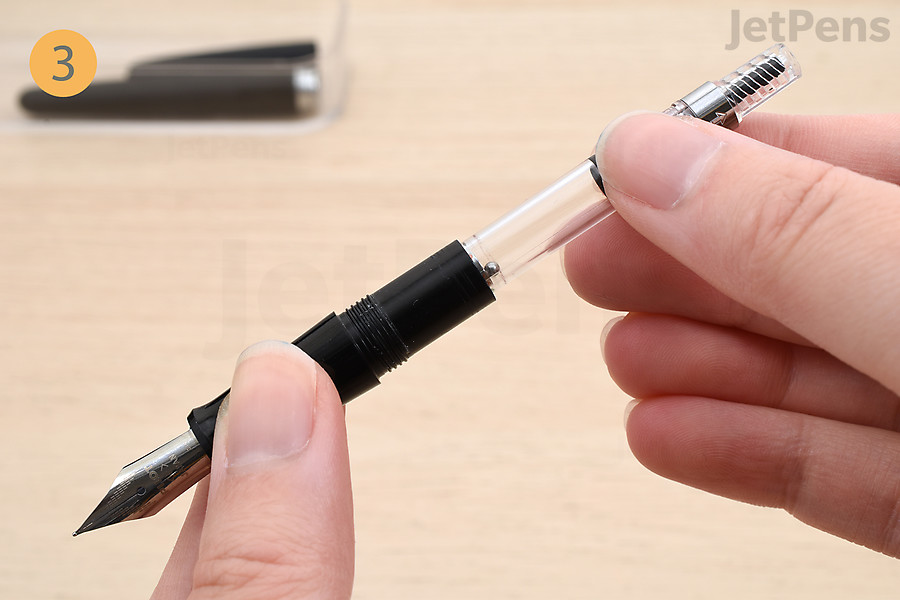
Insert the converter into the fountain pen’s grip section.
Step 3: Insert the converter into the fountain pen’s grip section.
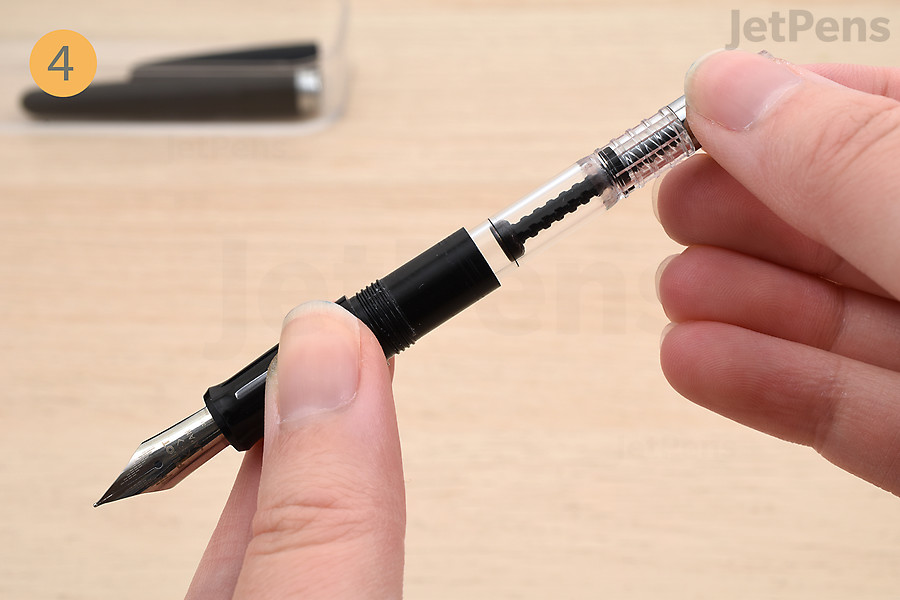
Twist the piston knob to extend the piston.
Step 4: Twist the piston knob to extend the piston. Twisting the piston knob outside of the ink bottle prevents ink from splashing out.
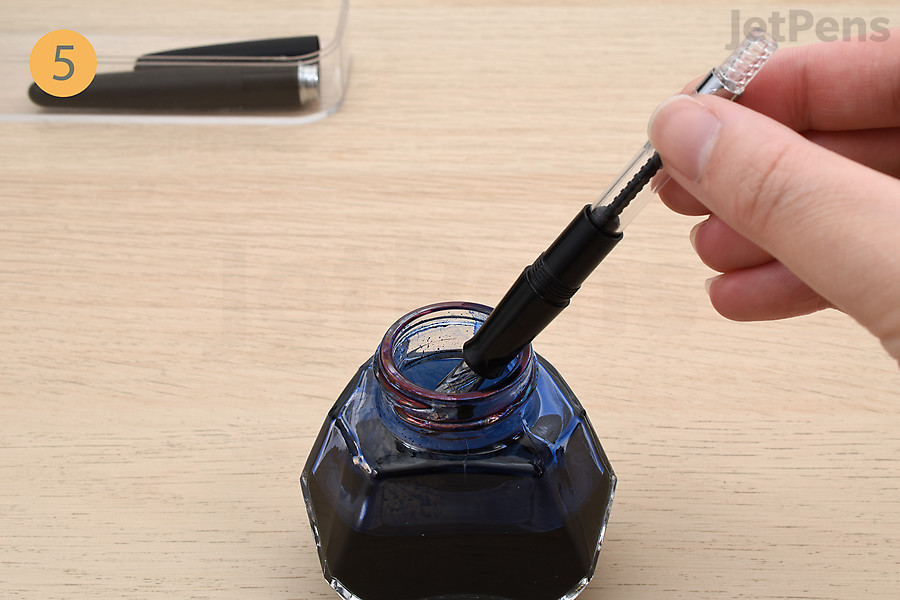
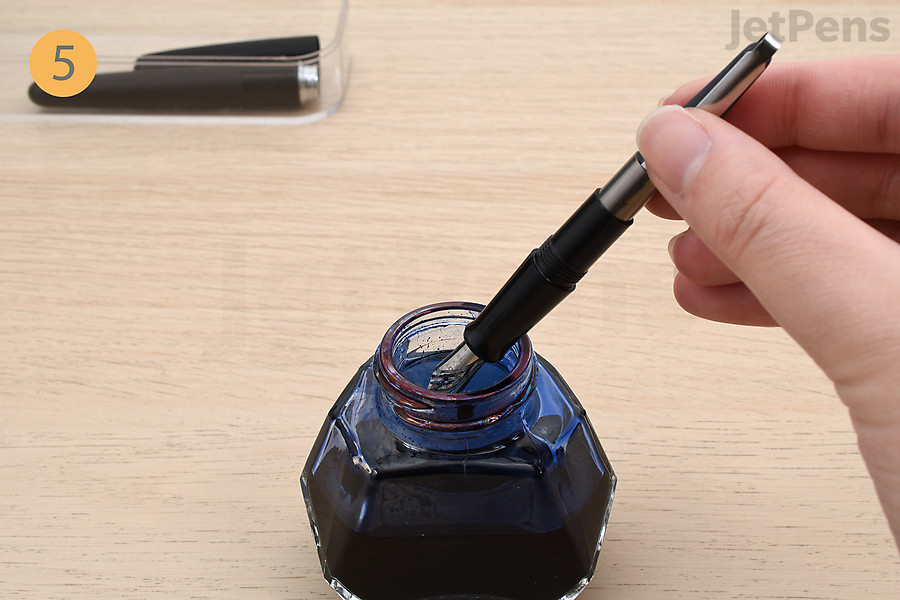
Dip the fountain pen in an ink bottle.
Step 5: Dip the fountain pen in an ink bottle, being sure to submerge the entire nib and feed.
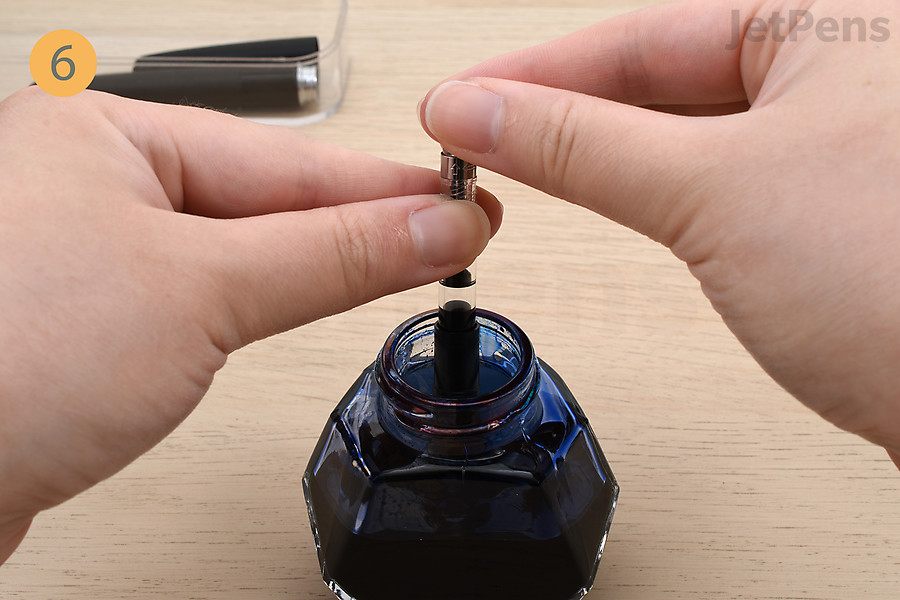
Twist the piston knob in the opposite direction to retract the piston and fill the converter’s reservoir.
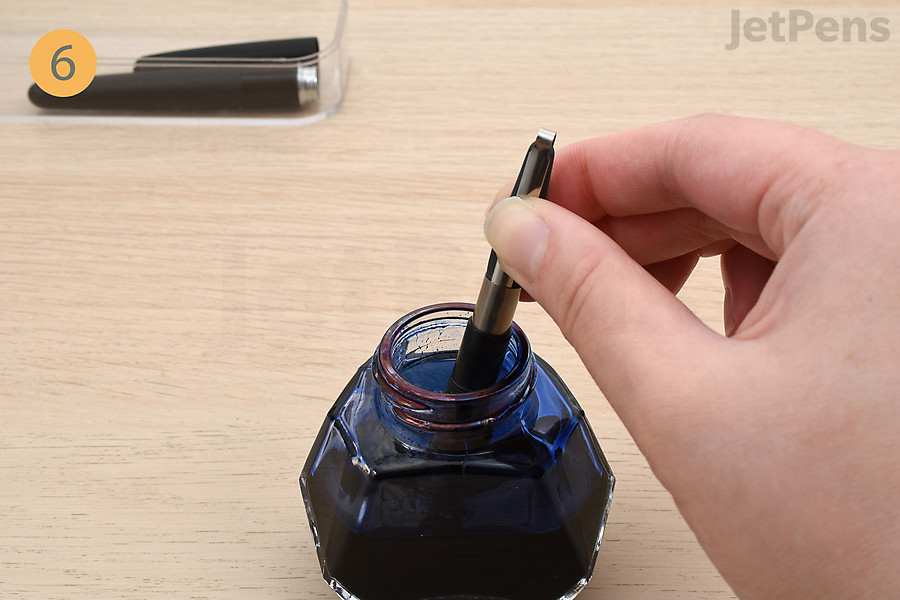
Step 6: Twist the piston knob in the opposite direction to retract the piston and fill the converter’s reservoir. Most converters won’t reach capacity on the first filling, but you can expel the ink and refill the converter again to shrink any air bubbles.
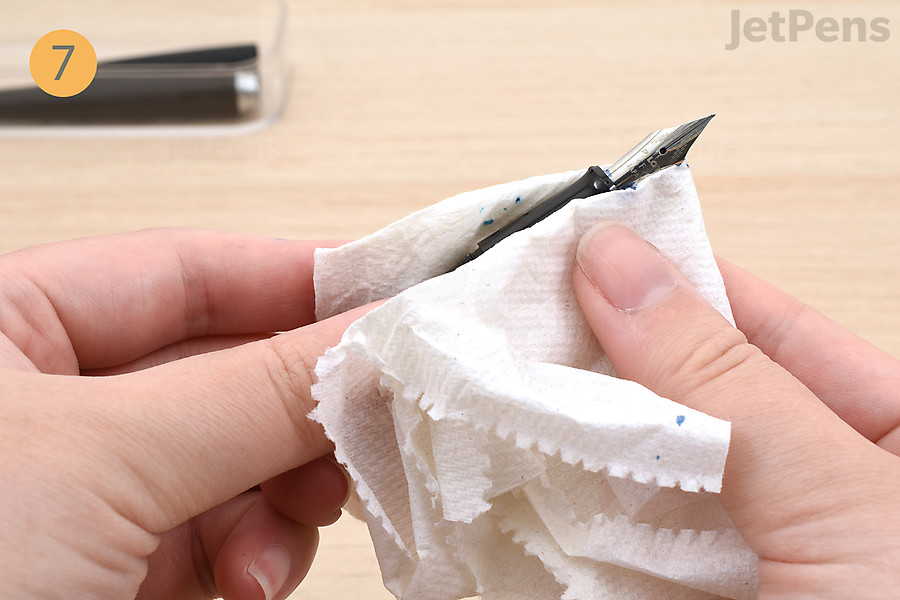
Wipe the nib and grip section with a paper towel or soft cloth.
Step 7: Wipe the nib and grip section with a paper towel or soft cloth.
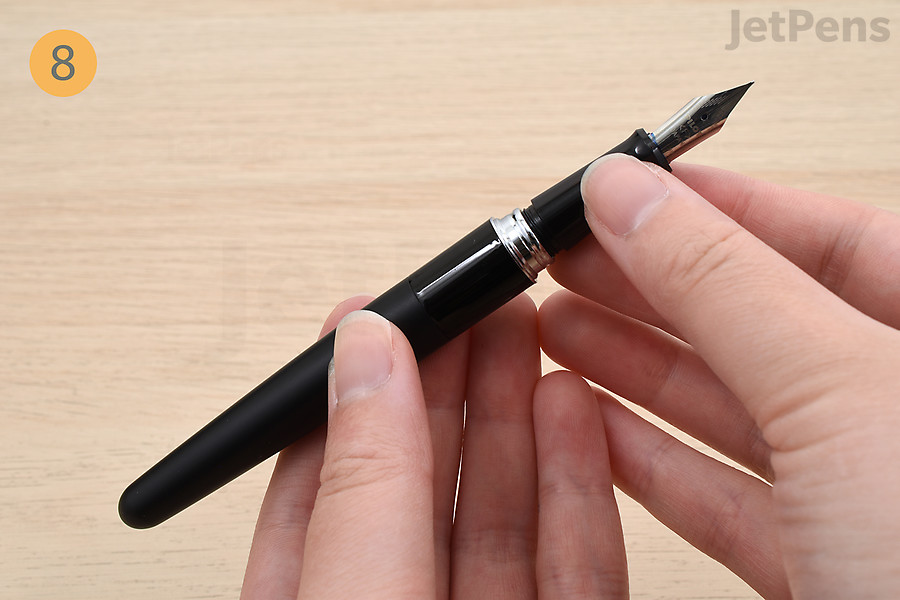
Reassemble the fountain pen.
Step 8: Reassemble the fountain pen. Since the nib and feed were dipped in ink, you can usually start writing immediately.
How to Fill a Fountain Pen with a Squeeze Converter

We used a Pilot Metropolitan Fountain Pen and Pilot CON-B Converter for this section.

Uncap the pen and unscrew the grip section.
Step 1: Uncap the pen and unscrew the grip section. The converter should be installed in the feed side of the grip section, on the other side of the nib.
Locate the converter’s opening.
Step 2: Locate the converter’s opening.
Insert the converter into the fountain pen’s grip section.
Step 3: Insert the converter into the fountain pen’s grip section.
Squeeze and hold the converter.
Step 4: Squeeze and hold the converter. Squeezing the converter outside of the ink bottle prevents ink from splashing out.
Dip the fountain pen in an ink bottle.
Step 5: Dip the fountain pen in an ink bottle, being sure to submerge the entire nib and feed.
Release the converter slowly to fill the reservoir.
Step 6: Release the converter slowly. Wait a few seconds to allow ink to enter the converter’s reservoir. Most converters won’t reach capacity on the first filling, but you can expel the ink and refill the converter again to shrink any air bubbles.
Wipe the nib and grip section with a paper towel or soft cloth.
Step 7: Wipe the nib and grip section with a paper towel or soft cloth.
Reassemble the fountain pen.
Step 8: Reassemble the fountain pen. Since the nib and feed were dipped in ink, you can usually start writing immediately.
Advantages and Disadvantages of Converters
Advantages Disadvantages
  • Many brands use proprietary converters that can’t be used with pens from other brands.
  • Converters have smaller ink capacities than built-in filling systems.
  • Filling a converter from an ink bottle is less convenient than installing a cartridge.
Piston-Filled Fountain Pens
Piston-filled fountain pens have internal filling mechanisms.
Some fountain pens have a filling system built directly into the pen. Piston-filled fountain pens work similarly to piston converters. However, they have much larger ink capacities. A piston-filled fountain pen typically holds at least twice the amount of ink as a cartridge or converter! If you have a lot to write (or don’t want to refill your pen often), a piston-filled fountain pen is the way to go.

Be sure to have a paper towel or soft cloth on hand to wipe the nib and feed when you’re done filling the pen.

How to Fill a Fountain Pen with a Piston-Filling Mechanism

We used a TWSBI ECO Fountain Pen in this section.

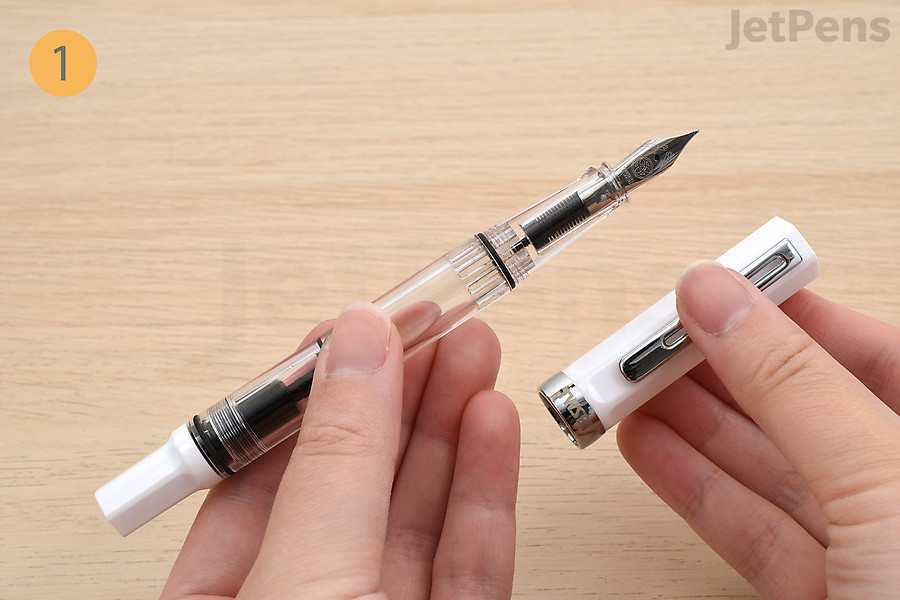
Uncap the pen.
Uncap the pen.
Step 1: Uncap the pen.
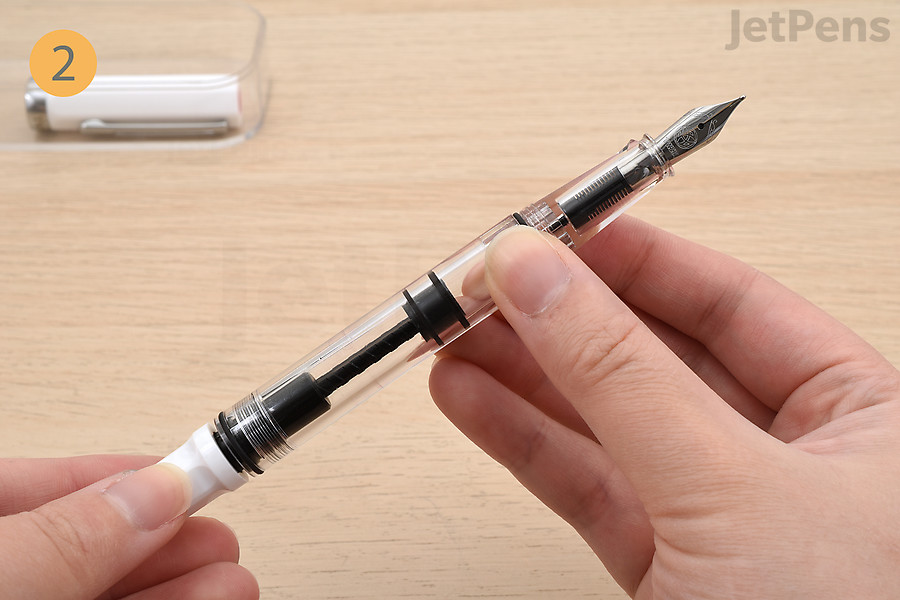
Twist the piston knob to extend the piston.
Step 2: Twist the piston knob to extend the piston. Twisting the piston knob outside of the ink bottle prevents ink from splashing out.
Dip the fountain pen in an ink bottle.
Step 3: Dip the fountain pen in an ink bottle, being sure to submerge the entire nib and feed.
Twist the piston knob in the opposite direction to retract the piston and fill the ink reservoir.
Twist the piston knob in the opposite direction to retract the piston and fill the reservoir.
Step 4: Twist the piston knob in the opposite direction to retract the piston and fill the ink reservoir. Most fountain pens won’t reach capacity on the first filling, but you can expel the ink and refill the reservoir again to shrink any air bubbles.
Wipe the nib and grip section with a paper towel or soft cloth.
Step 5: Wipe the nib and grip section with a paper towel or soft cloth. Since the nib and feed were dipped in ink, you can usually start writing immediately.
Advantages and Disadvantages of Piston-Filling Mechanisms
Advantages Disadvantages
  • Piston-filled fountain pens have large ink capacities.
  • Piston-filled fountain pens allow you to fill your fountain pen from a wide variety of bottled inks.
  • Piston-filled fountain pens tend to be more expensive than cartridge- or converter-filled fountain pens.
  • Piston-filled fountain pens can’t use ink cartridges, so you must have bottled inks available.
Vacuum-Filled Fountain Pens
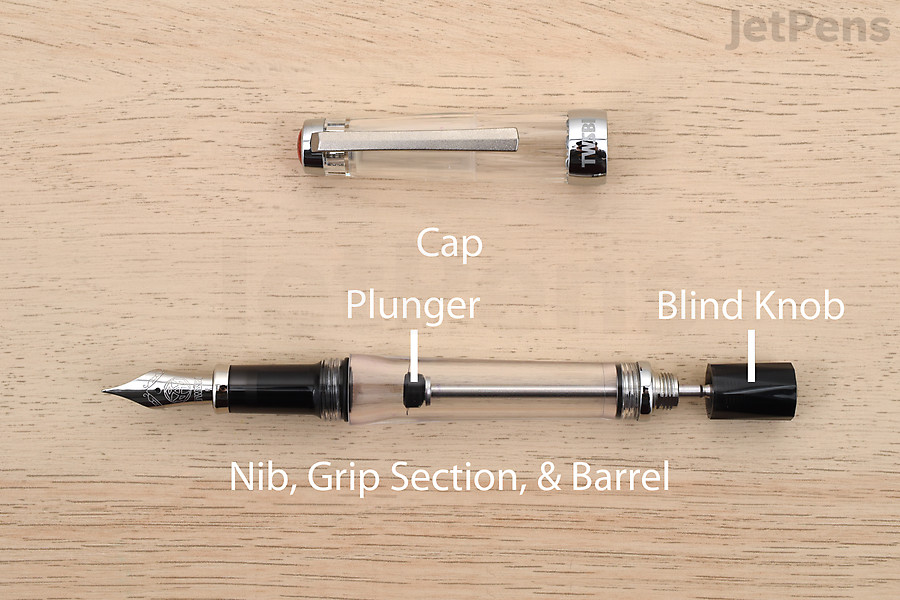
A vacuum is another type of internal filling mechanism for fountain pens.
Vacuum-filling mechanisms are less common than piston-filling mechanisms and are usually only found on luxury fountain pens. This built-in filling system has a large ink capacity because the pen’s entire barrel becomes the ink reservoir.

Most vacuum-filled fountain pens have safety valves that help prevent leaks. To activate the safety valve, simply screw down the blind knob all the way. This causes the rubber seal at the bottom of the plunger to rest against an internal “gate.” You’ll still have access to a small amount of ink in case you need to jot down notes. You can unscrew the blind knob slightly to release the seal.

Since you’ll dip a vacuum-filled fountain pen’s nib and feed in ink, keep a paper towel or soft cloth on hand to wipe them clean.

How to Fill a Fountain Pen with a Vacuum-Filling Mechanism

We used a TWSBI Vac700R Fountain Pen in this section.

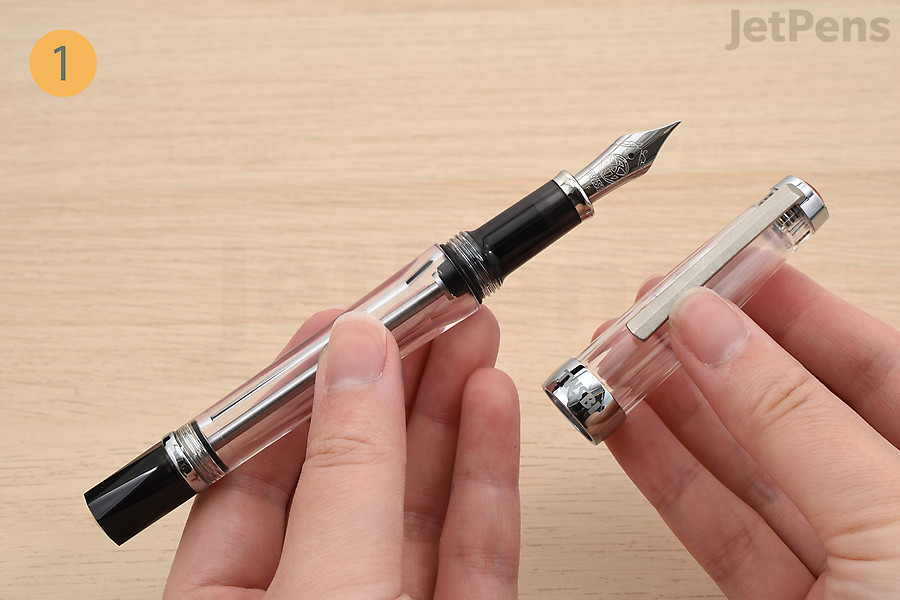
Uncap the pen.
Uncap the pen.
Step 1: Uncap the pen.
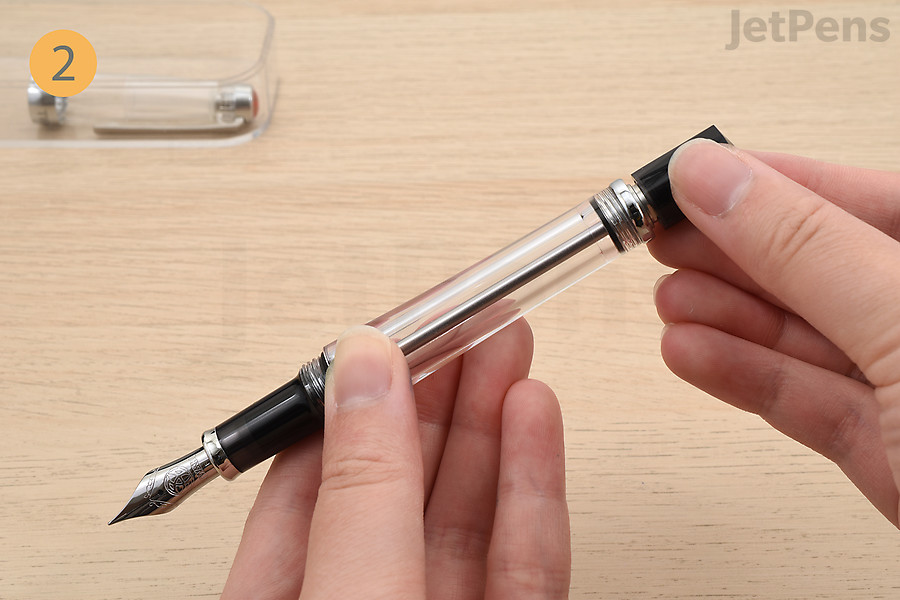
Twist the blind knob to unlock the plunger.
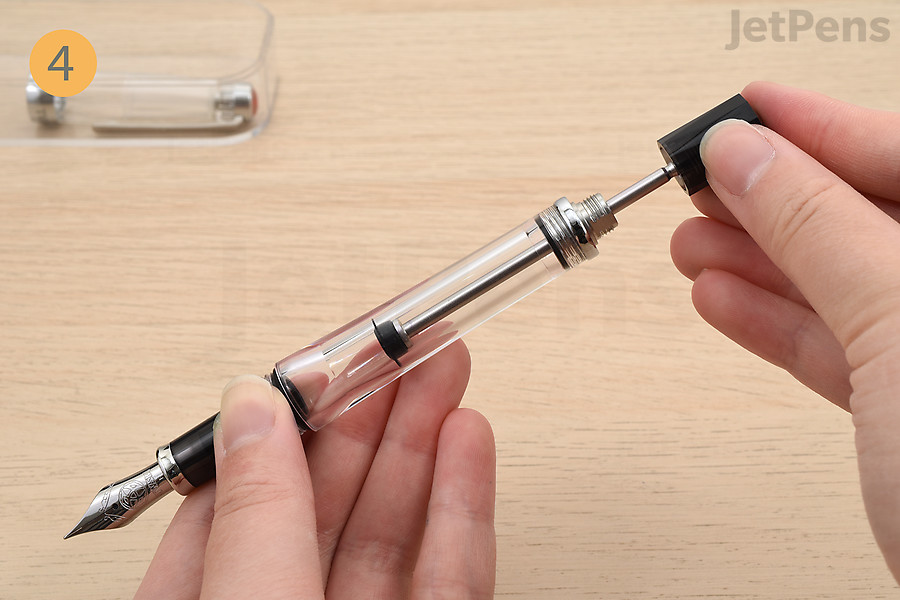
Step 2: Twist the blind knob to unlock the plunger.
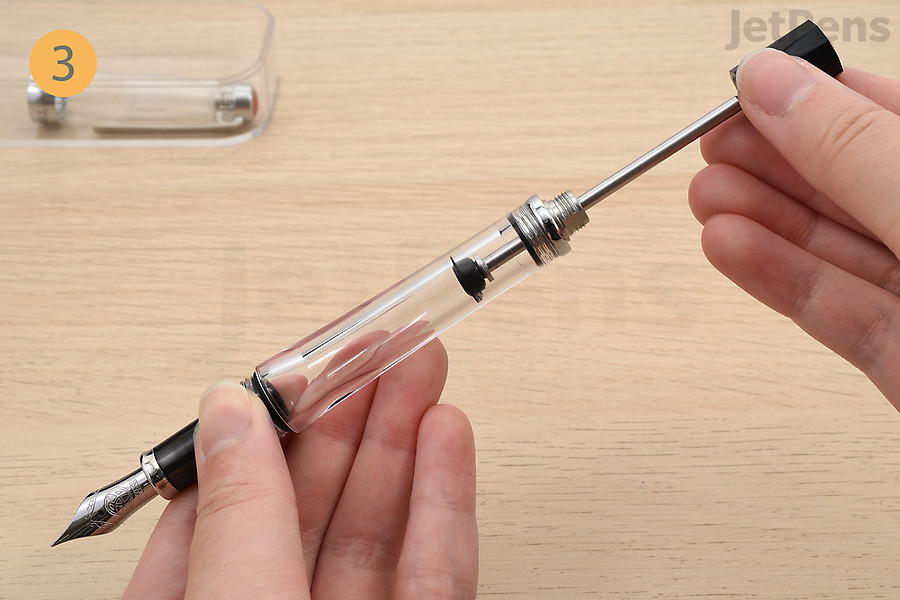
Pull back on the blind knob to retract the plunger.
Step 3: Pull back on the blind knob to retract the plunger.
Push the knob down until you feel resistance.
Step 4: Push the knob down until you feel resistance. Pushing the knob outside of the ink bottle prevents ink from splashing out.
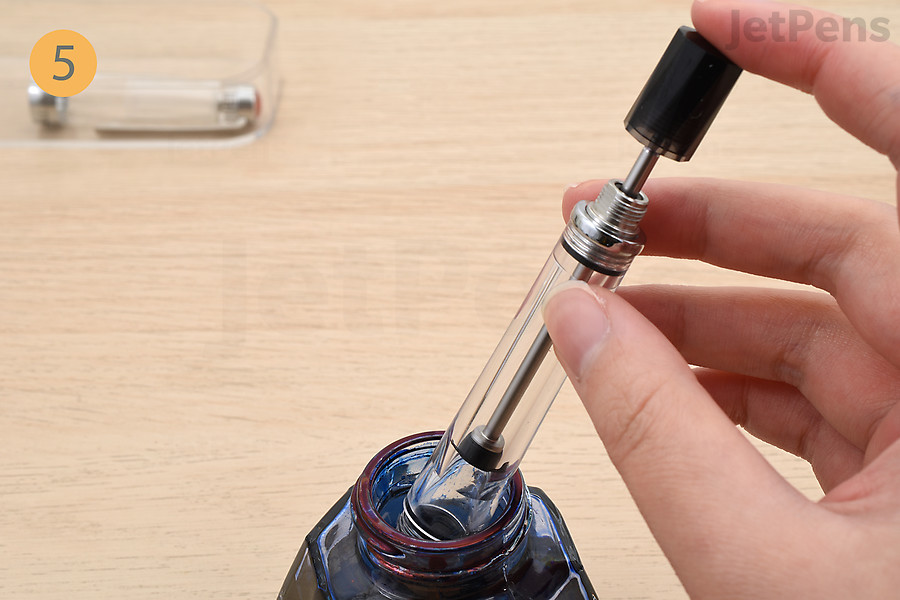
Dip the fountain pen in an ink bottle.
Step 5: Dip the fountain pen in an ink bottle, being sure to submerge the entire nib and feed.
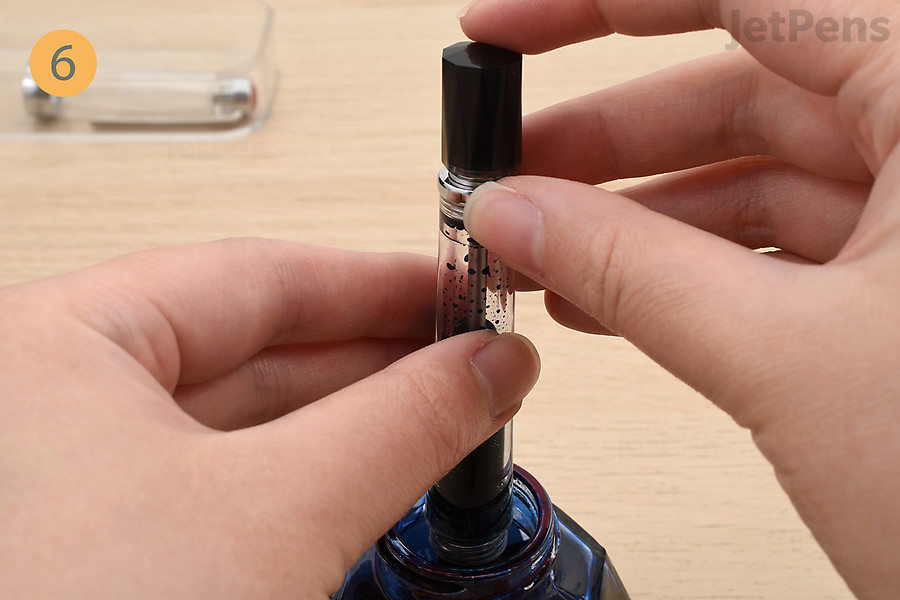
Push the knob down completely to fill the reservoir.
Step 6: Push the knob down completely to fill the reservoir.
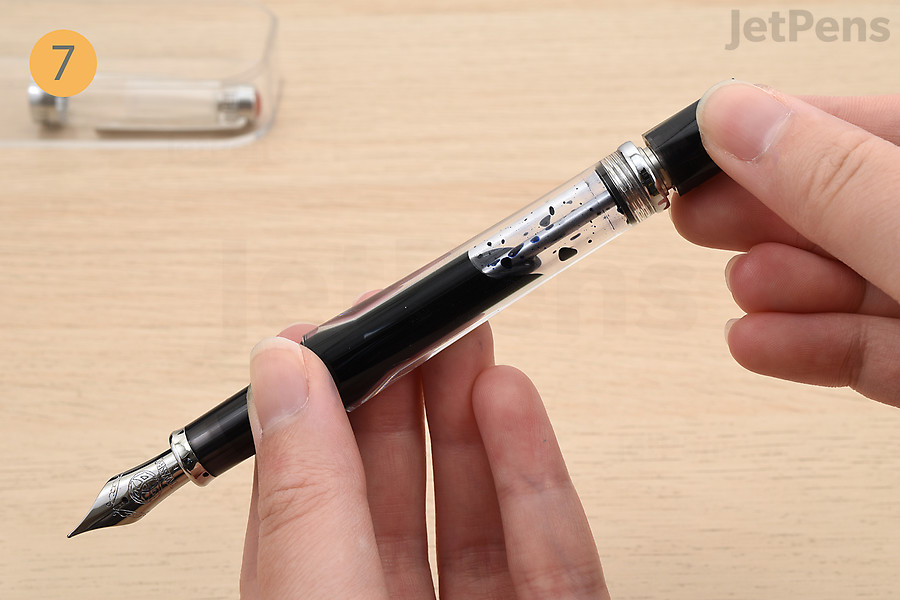
Screw the blind knob down until it’s almost entirely seated.
Step 7: Screw the blind knob down until it’s almost entirely seated, leaving about a 2 mm gap between the knob and the barrel. Screwing the blind knob down all the way will activate the safety valve.
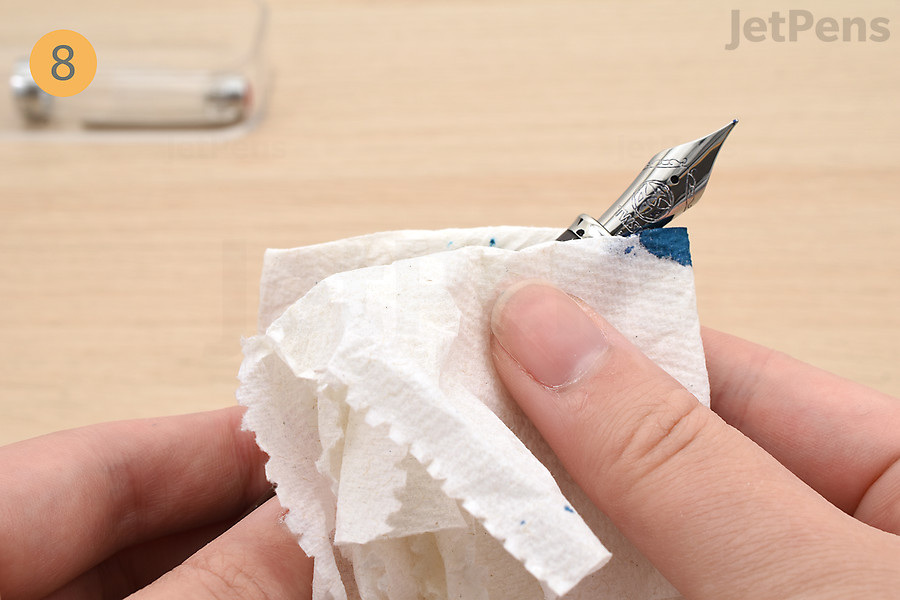
Wipe the nib and grip section with a paper towel or soft cloth.
Step 8: Wipe the nib and grip section with a paper towel or soft cloth. Since the nib and feed were dipped in ink, you can usually start writing immediately.
Advantages and Disadvantages of Vacuum-Filling Mechanisms
Advantages Disadvantages
  • Vacuum-filled fountain pens have large ink capacities.
  • Vacuum-filled fountain pens usually have safety valves that seal off the reservoirs and prevent leaks.
  • Vacuum-filled fountain pens allow you to fill your fountain pen from a wide variety of bottled inks.
  • Vacuum-filled fountain pens tend to be more expensive than cartridge- or converter-filled pens.
  • Vacuum-filled fountain pens can’t use ink cartridges, so you must have bottled inks available.
Eyedropper-Filled Fountain Pens
Eyedropper-filled fountain pens don’t have an internal filling mechanism and filled by adding ink directly to the barrel.
Like its name suggests, an eyedropper-filled fountain pen is filled with bottled ink using an eyedropper, syringe, or pipette. Because there are no parts to install or operate, an eyedropper-filled fountain pen is incredibly easy to use.

Some fountain pens are convertible so they can be filled with an eyedropper. These pens don’t have holes in the barrels or metal pieces that may come in contact with the ink (other than the nib, of course). You’ll need an O-ring and silicone grease to create a watertight seal between the grip section and barrel.

Other fountain pens can be eyedropper filled if they’ve been modified. Modification requires two-part epoxy to seal holes in the barrel.

How to Fill a Fountain Pen with an Eyedropper

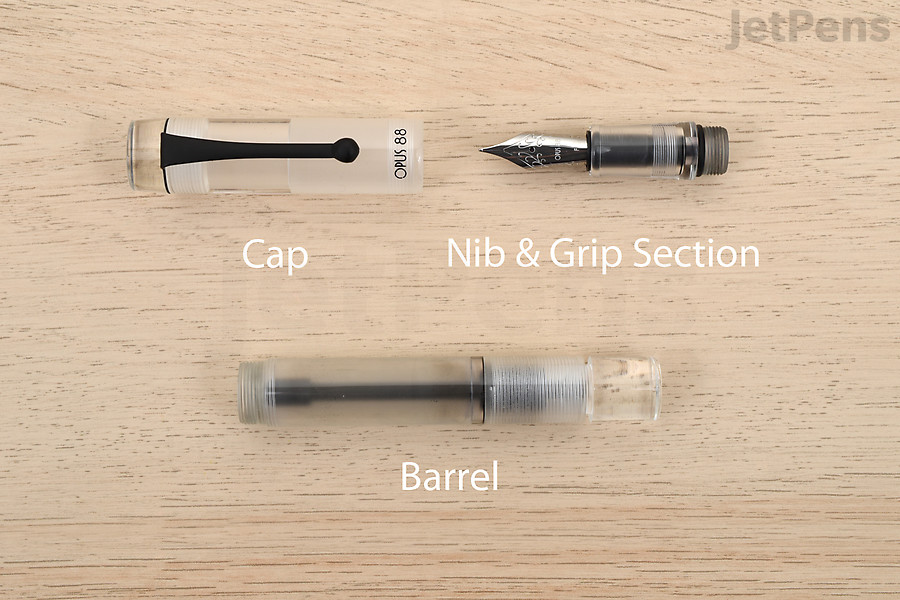
We used an Opus 88 Demo Fountain Pen in this section.

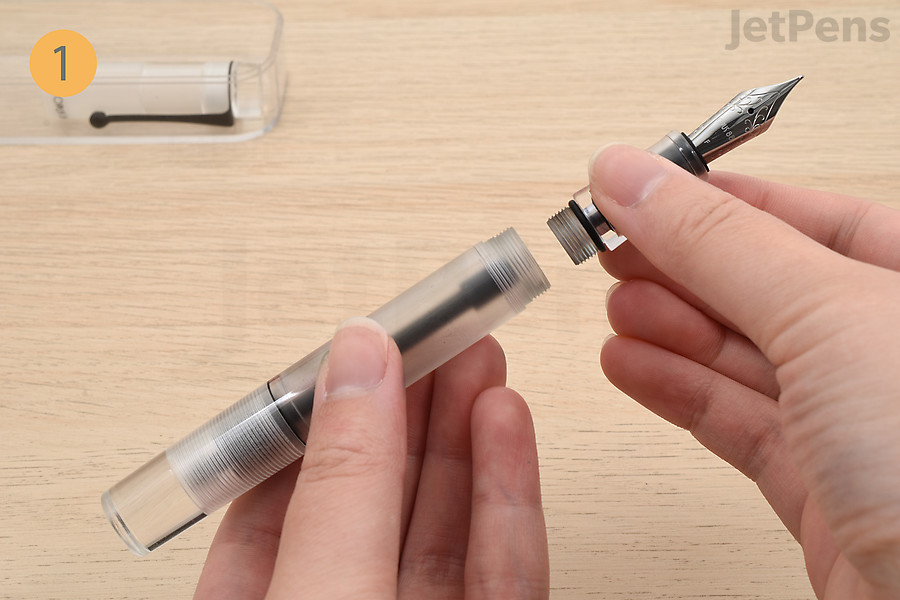
Uncap the pen and unscrew the grip section.
Step 1: Uncap the pen and unscrew the grip section.
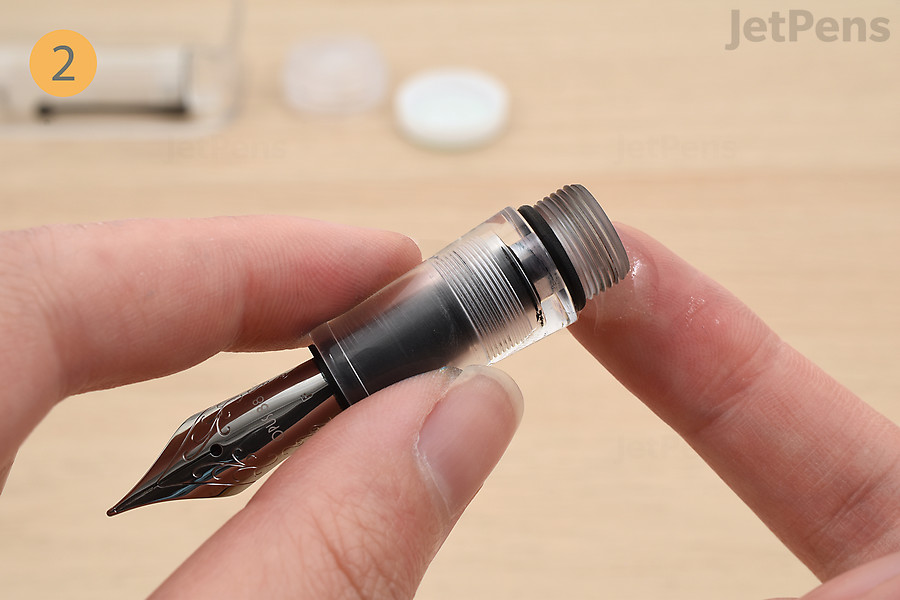
If needed, coat the threads of the grip section with silicone grease to ensure a watertight seal.
Step 2: If needed, coat the threads of the grip section with silicone grease to ensure a watertight seal. Set the grip section aside in a small container so that it doesn’t roll away.
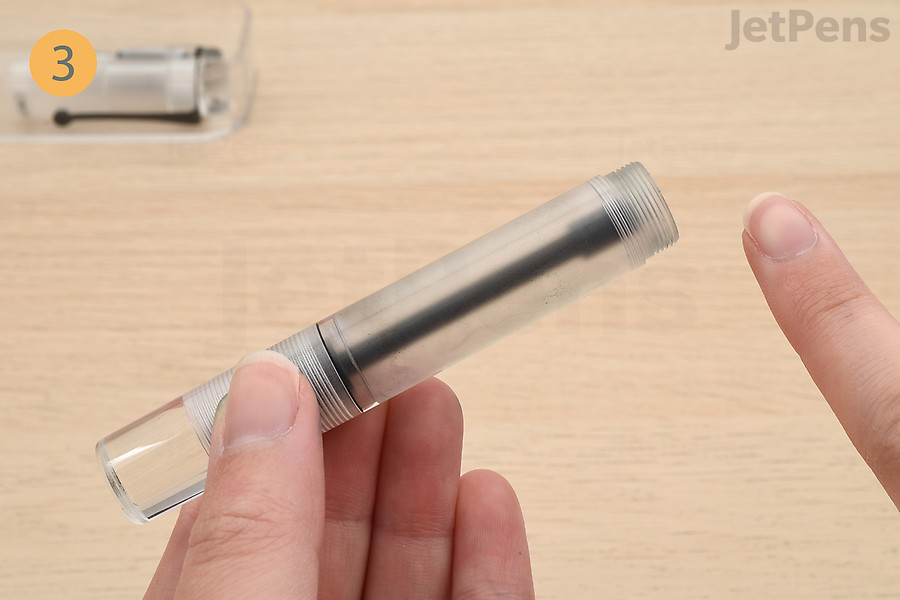
Locate the barrel’s opening.
Step 3: Locate the barrel’s opening.
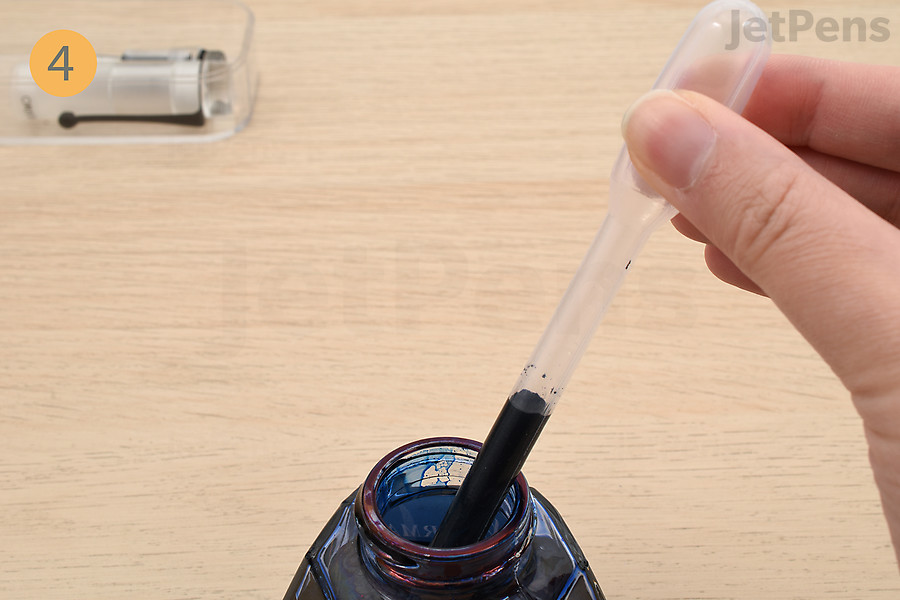
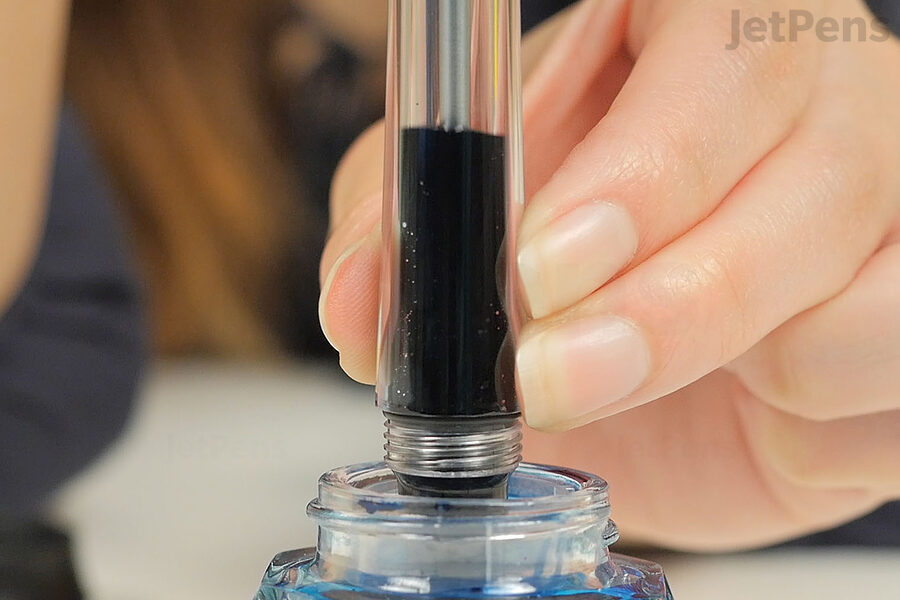
Fill an eyedropper, syringe, or pipette from an ink bottle.
Step 4: Fill an eyedropper, syringe, or pipette from an ink bottle.
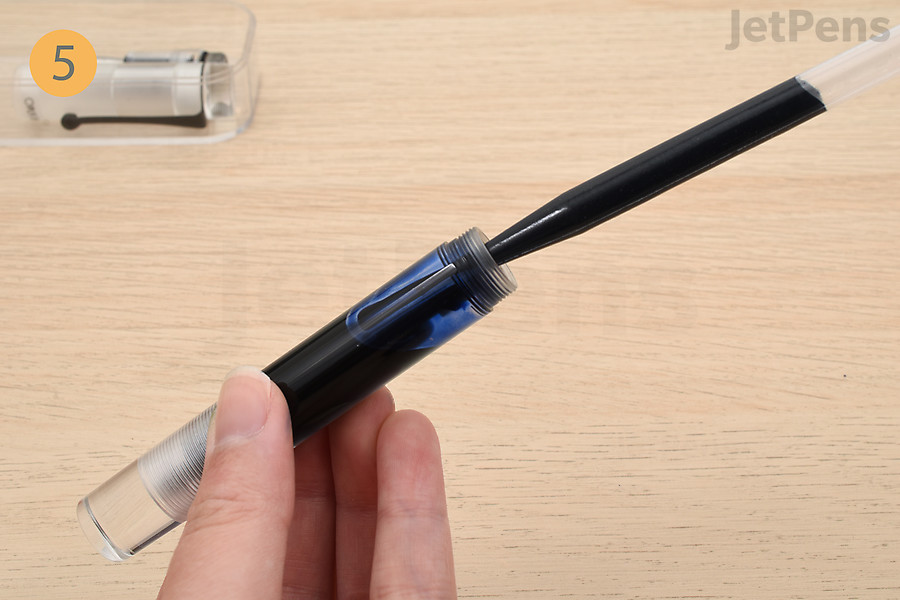
Fill the barrel with ink up to the bottom of the inside threads.
Step 5: Fill the barrel with ink up to the bottom of the inside threads.
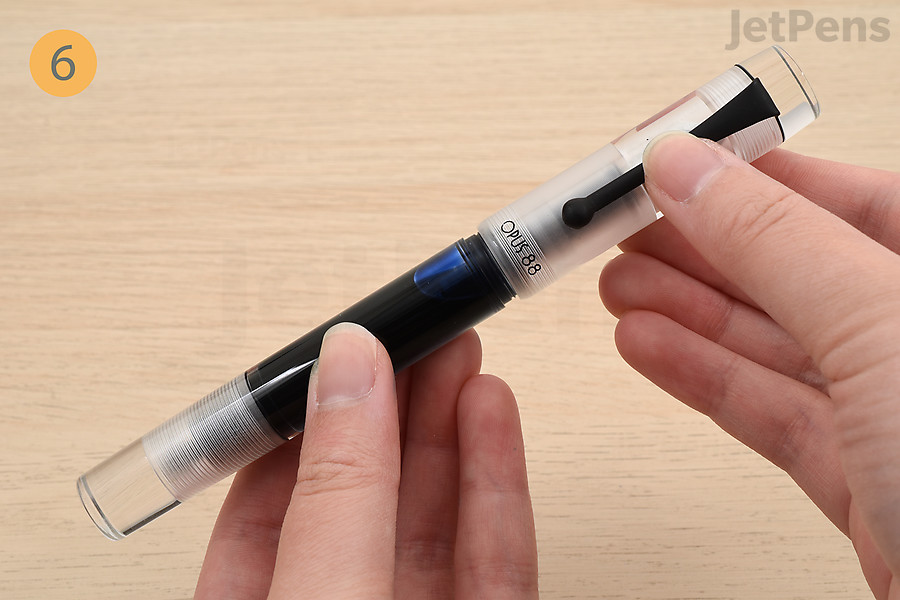
Reassemble the fountain pen and cap it.
Step 6: Reassemble the fountain pen and cap it.
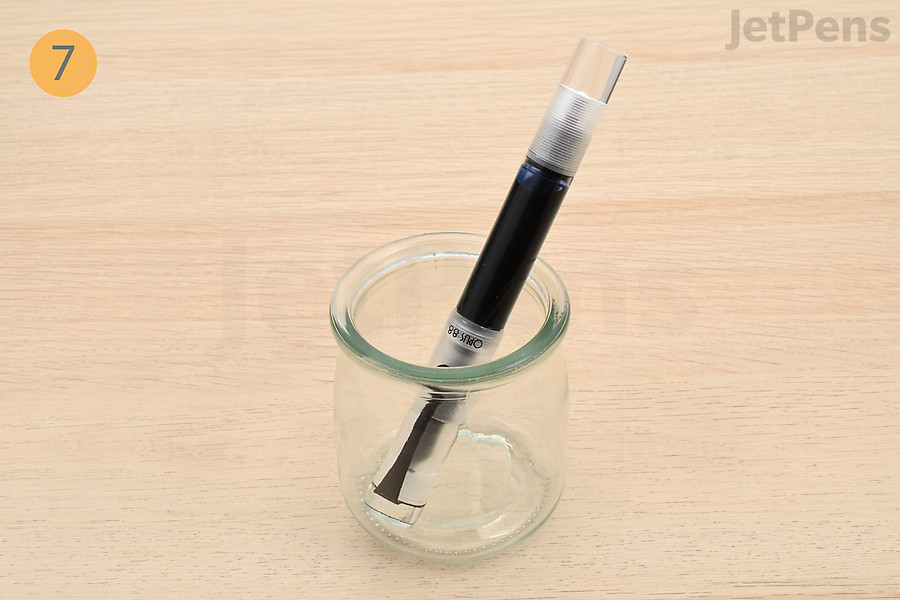
Let it sit for at least fifteen minutes so the ink can flow into the feed.
Step 7: Let the pen sit for at least fifteen minutes so the ink can flow into the feed. You can set it in a cup so the nib is facing down, or put it on its side in a tray.
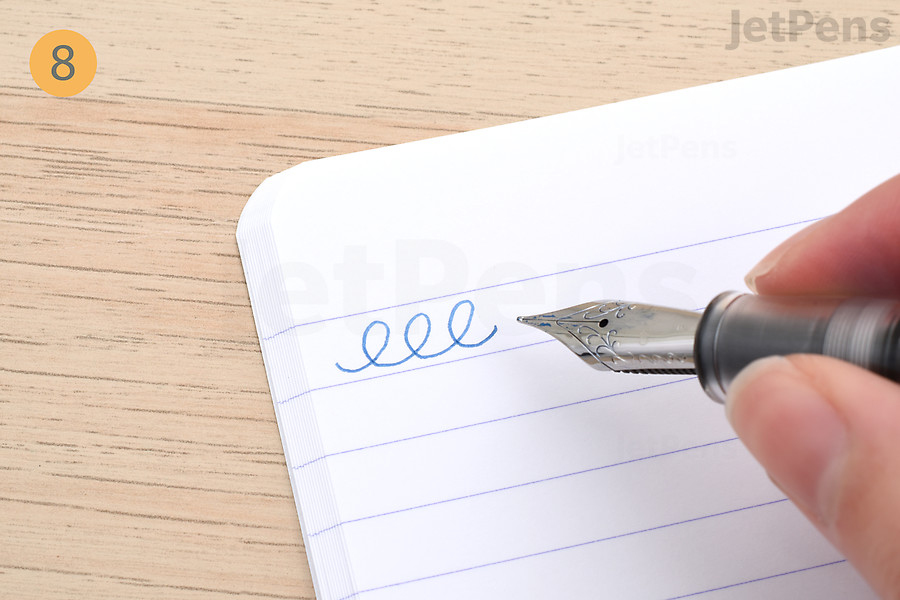
Try a few test scribbles.
Step 8: Try a few test scribbles. If the pen isn’t writing yet, cap it and let it sit for a while. It can take up to an hour for ink to reach the feed.
Advantages and Disadvantages of Eyedroppers
Advantages Disadvantages
  • It’s easy to fill an eyedropper-filled fountain pen.
  • Eyedropper-filled fountain pens have large ink capacities.
  • Eyedropper-filled fountain pens allow you to fill your fountain pen from a wide variety of bottled inks.
Fountain Pen Filling Systems Video
Conclusion

Learning how to ink your fountain pen is one of the first steps to become a fountain pen expert! Let us know in the comments below what your favorite ink filling system is and why.

Filling System Convenience Capacity Ink Options
Cartridge Cartridge - Convenience - High Cartridge - Capacity - Low Cartridge - Ink Options - Low
Converter Converter - Convenience - Medium Converter - Capacity - Low Converter - Ink Options - High
Built-In Piston Built-In Piston - Convenience - Medium Built-In Piston - Capacity - Medium Built-In Piston - Ink Options - High
Built-In Vacuum Built-In Vacuum - Convenience - Medium Built-In Vacuum - Capacity - Medium Built-In Piston - Ink Options - High
Eyedropper Eyedropper - Convenience - Low Eyedropper - Capacity - High Eyedropper - Ink Options - High


This website uses cookies as specified in our privacy policy.